
A reader asked for an explanation of this sentence from a previous post:
“With any tree, thick trunk or thin, follow the taper of the trunk and where the two lines of the sides meet, that’s roughly where your tree should end.“
I admit that wasn’t easy to follow. I often say something like that while teaching, in front of a tree, where it might make more sense. Hopefully the following images will explain this rough guideline.
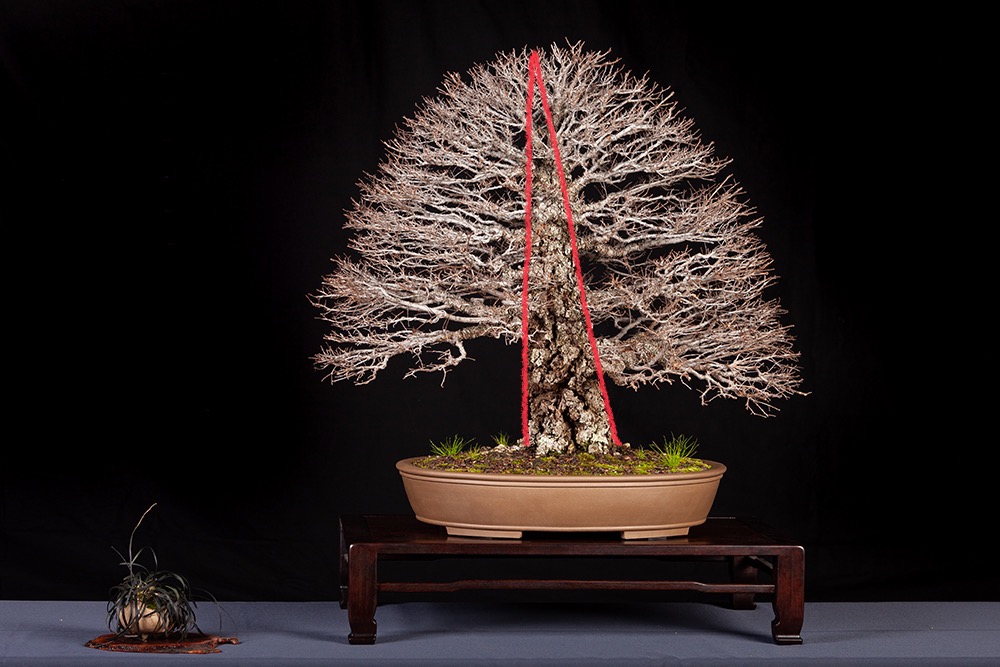
This elm is by Michael Roberts. It’s a great example of the utility of the guideline. If you take the taper of the lower trunk and follow that up, where the two lines meet is about where we should find the top of the bonsai.
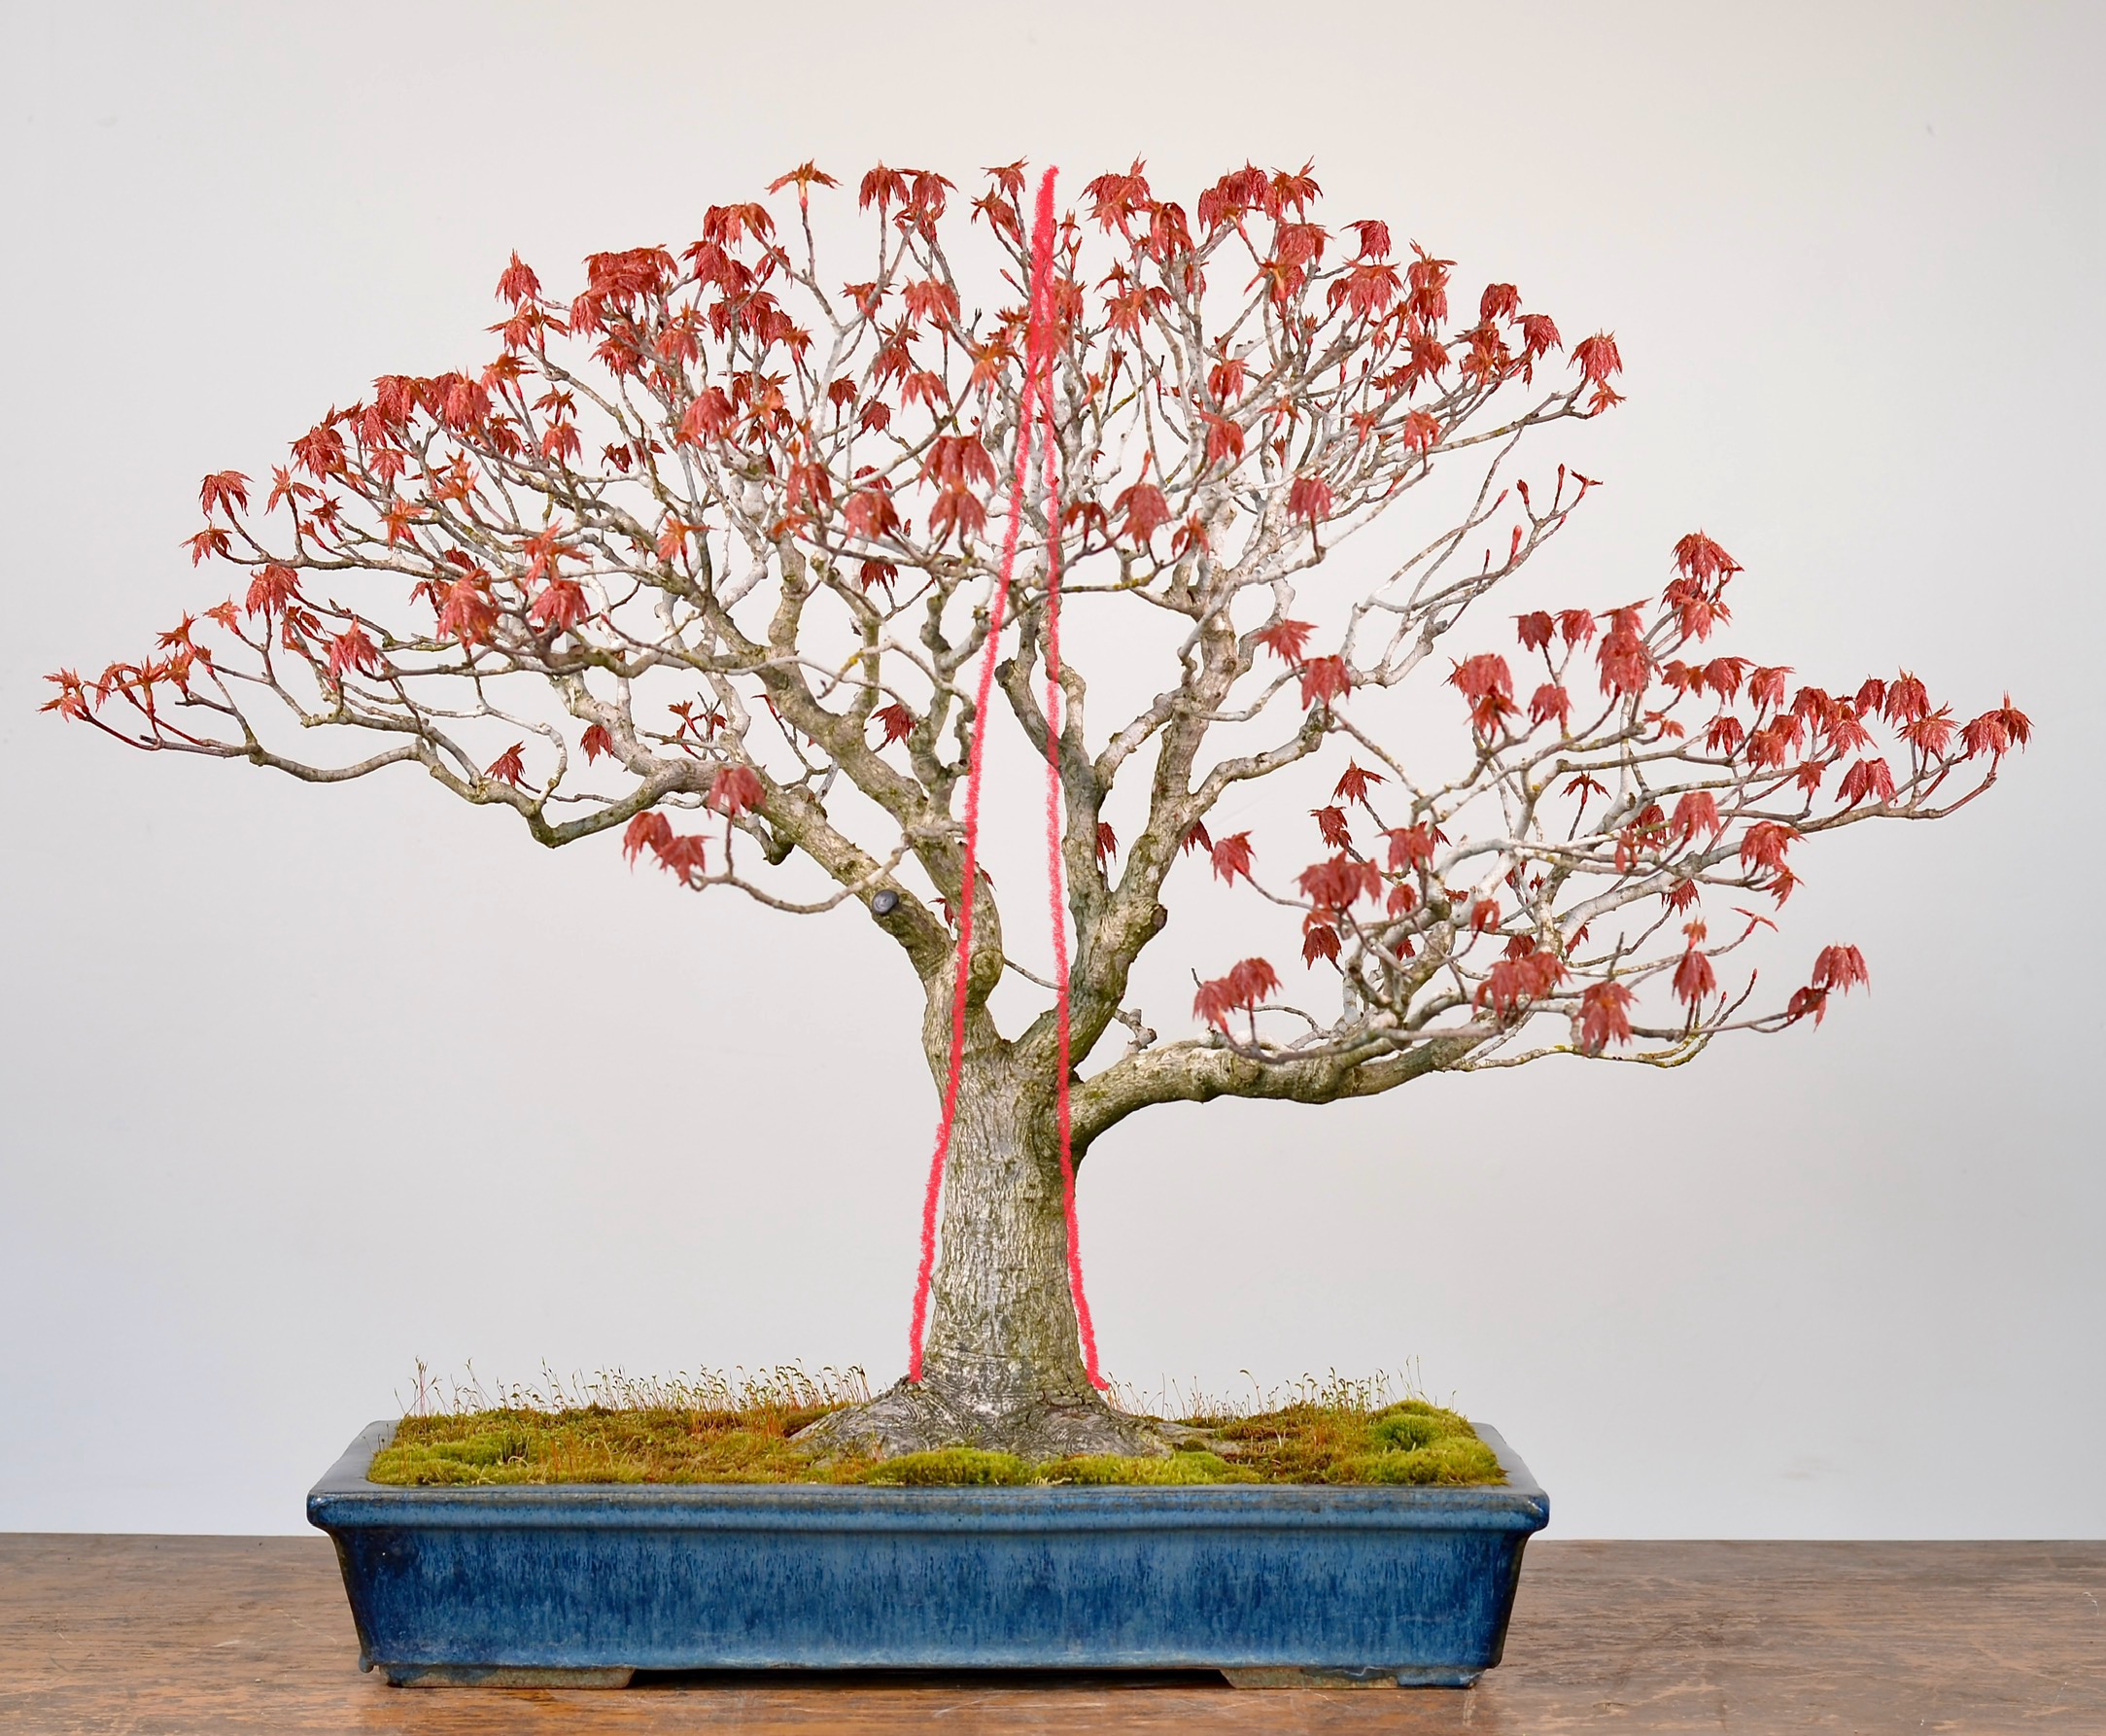
Another pretty clear example, a Red Maple by Anne Spencer.
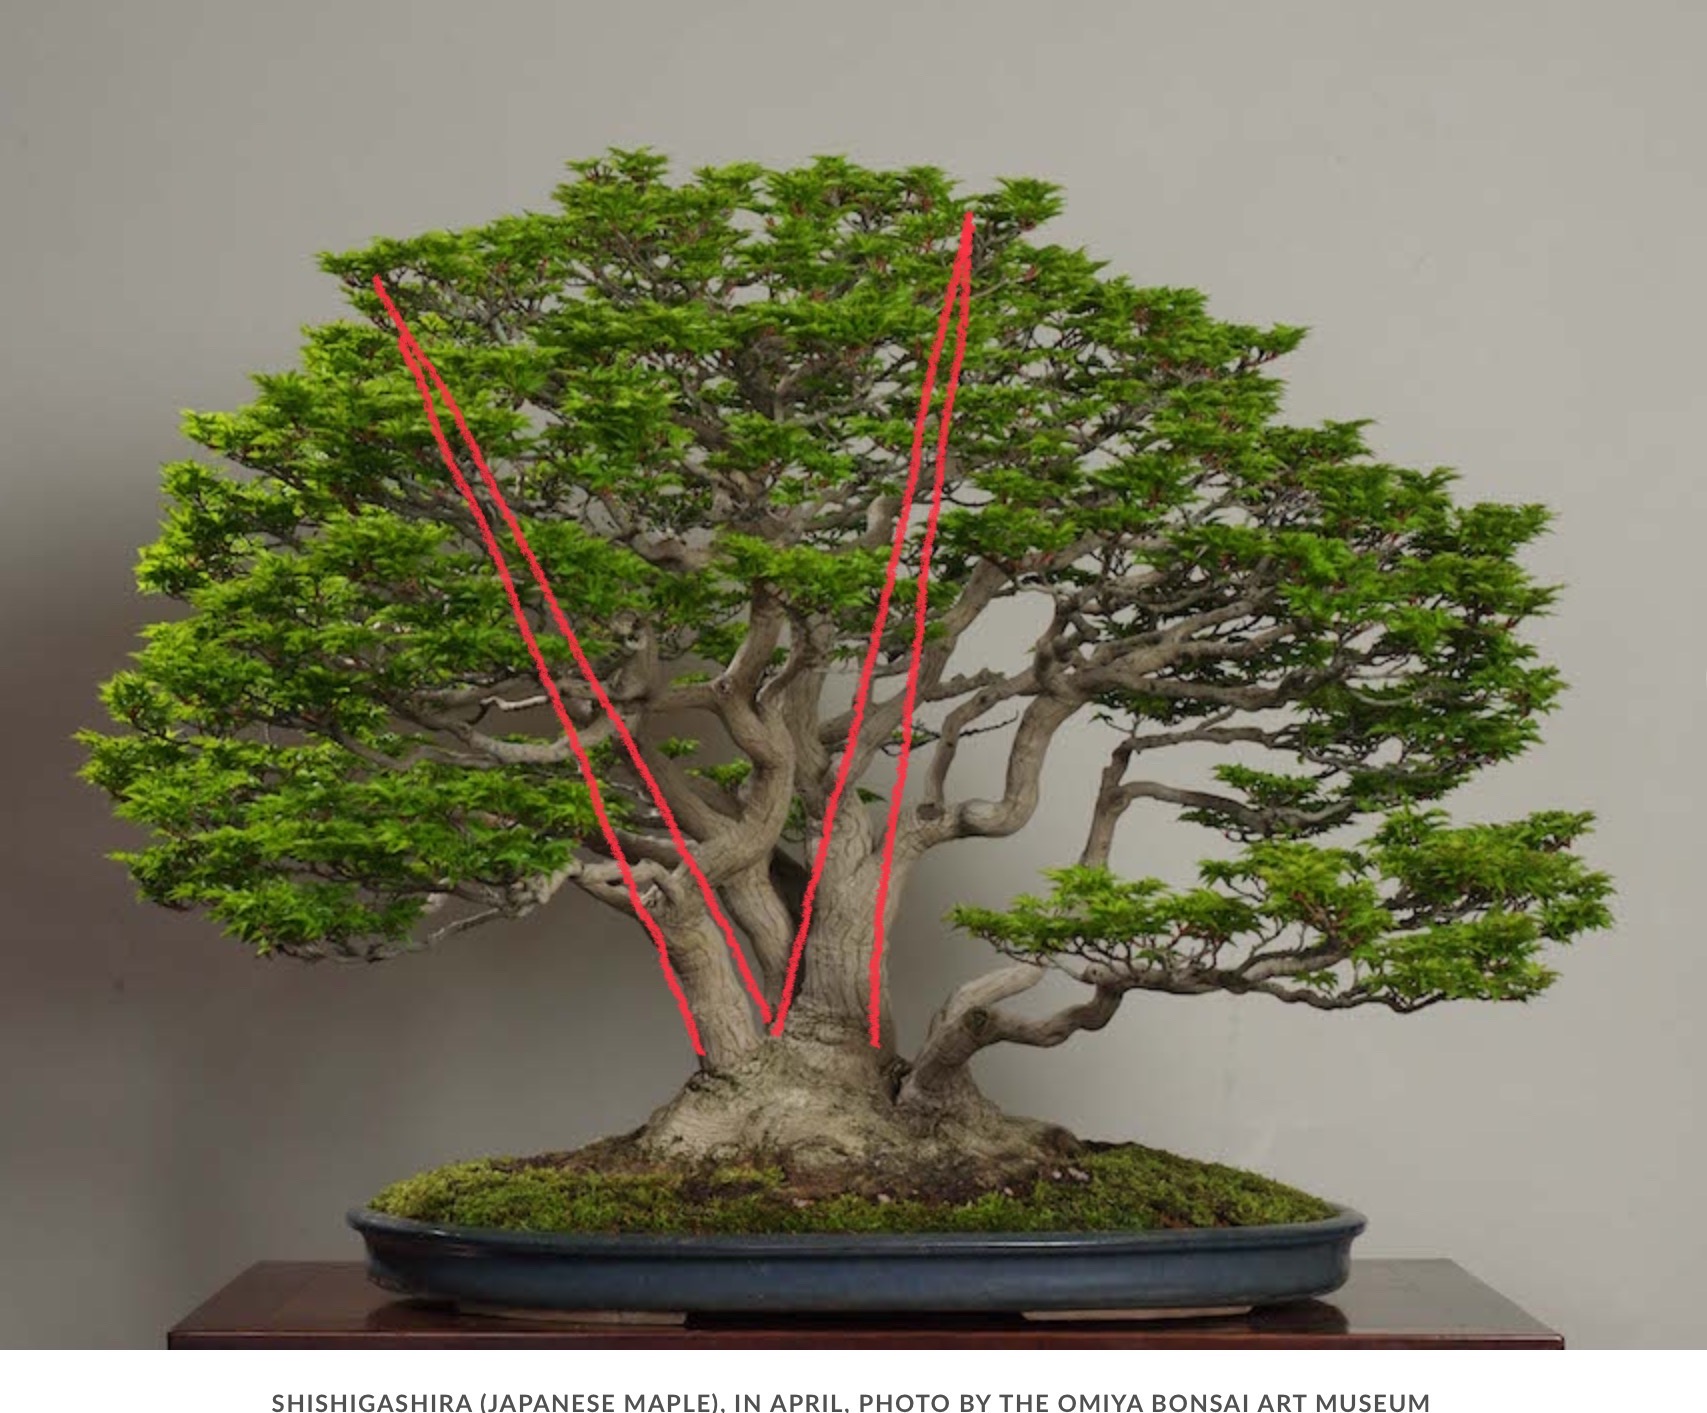
Here’s a multiple trunked Japanese Maple. With any of the trunks here, the lines from the lower trunk taper should still meet at the canopy periphery. Note that nebari flare is ignored in this guideline.
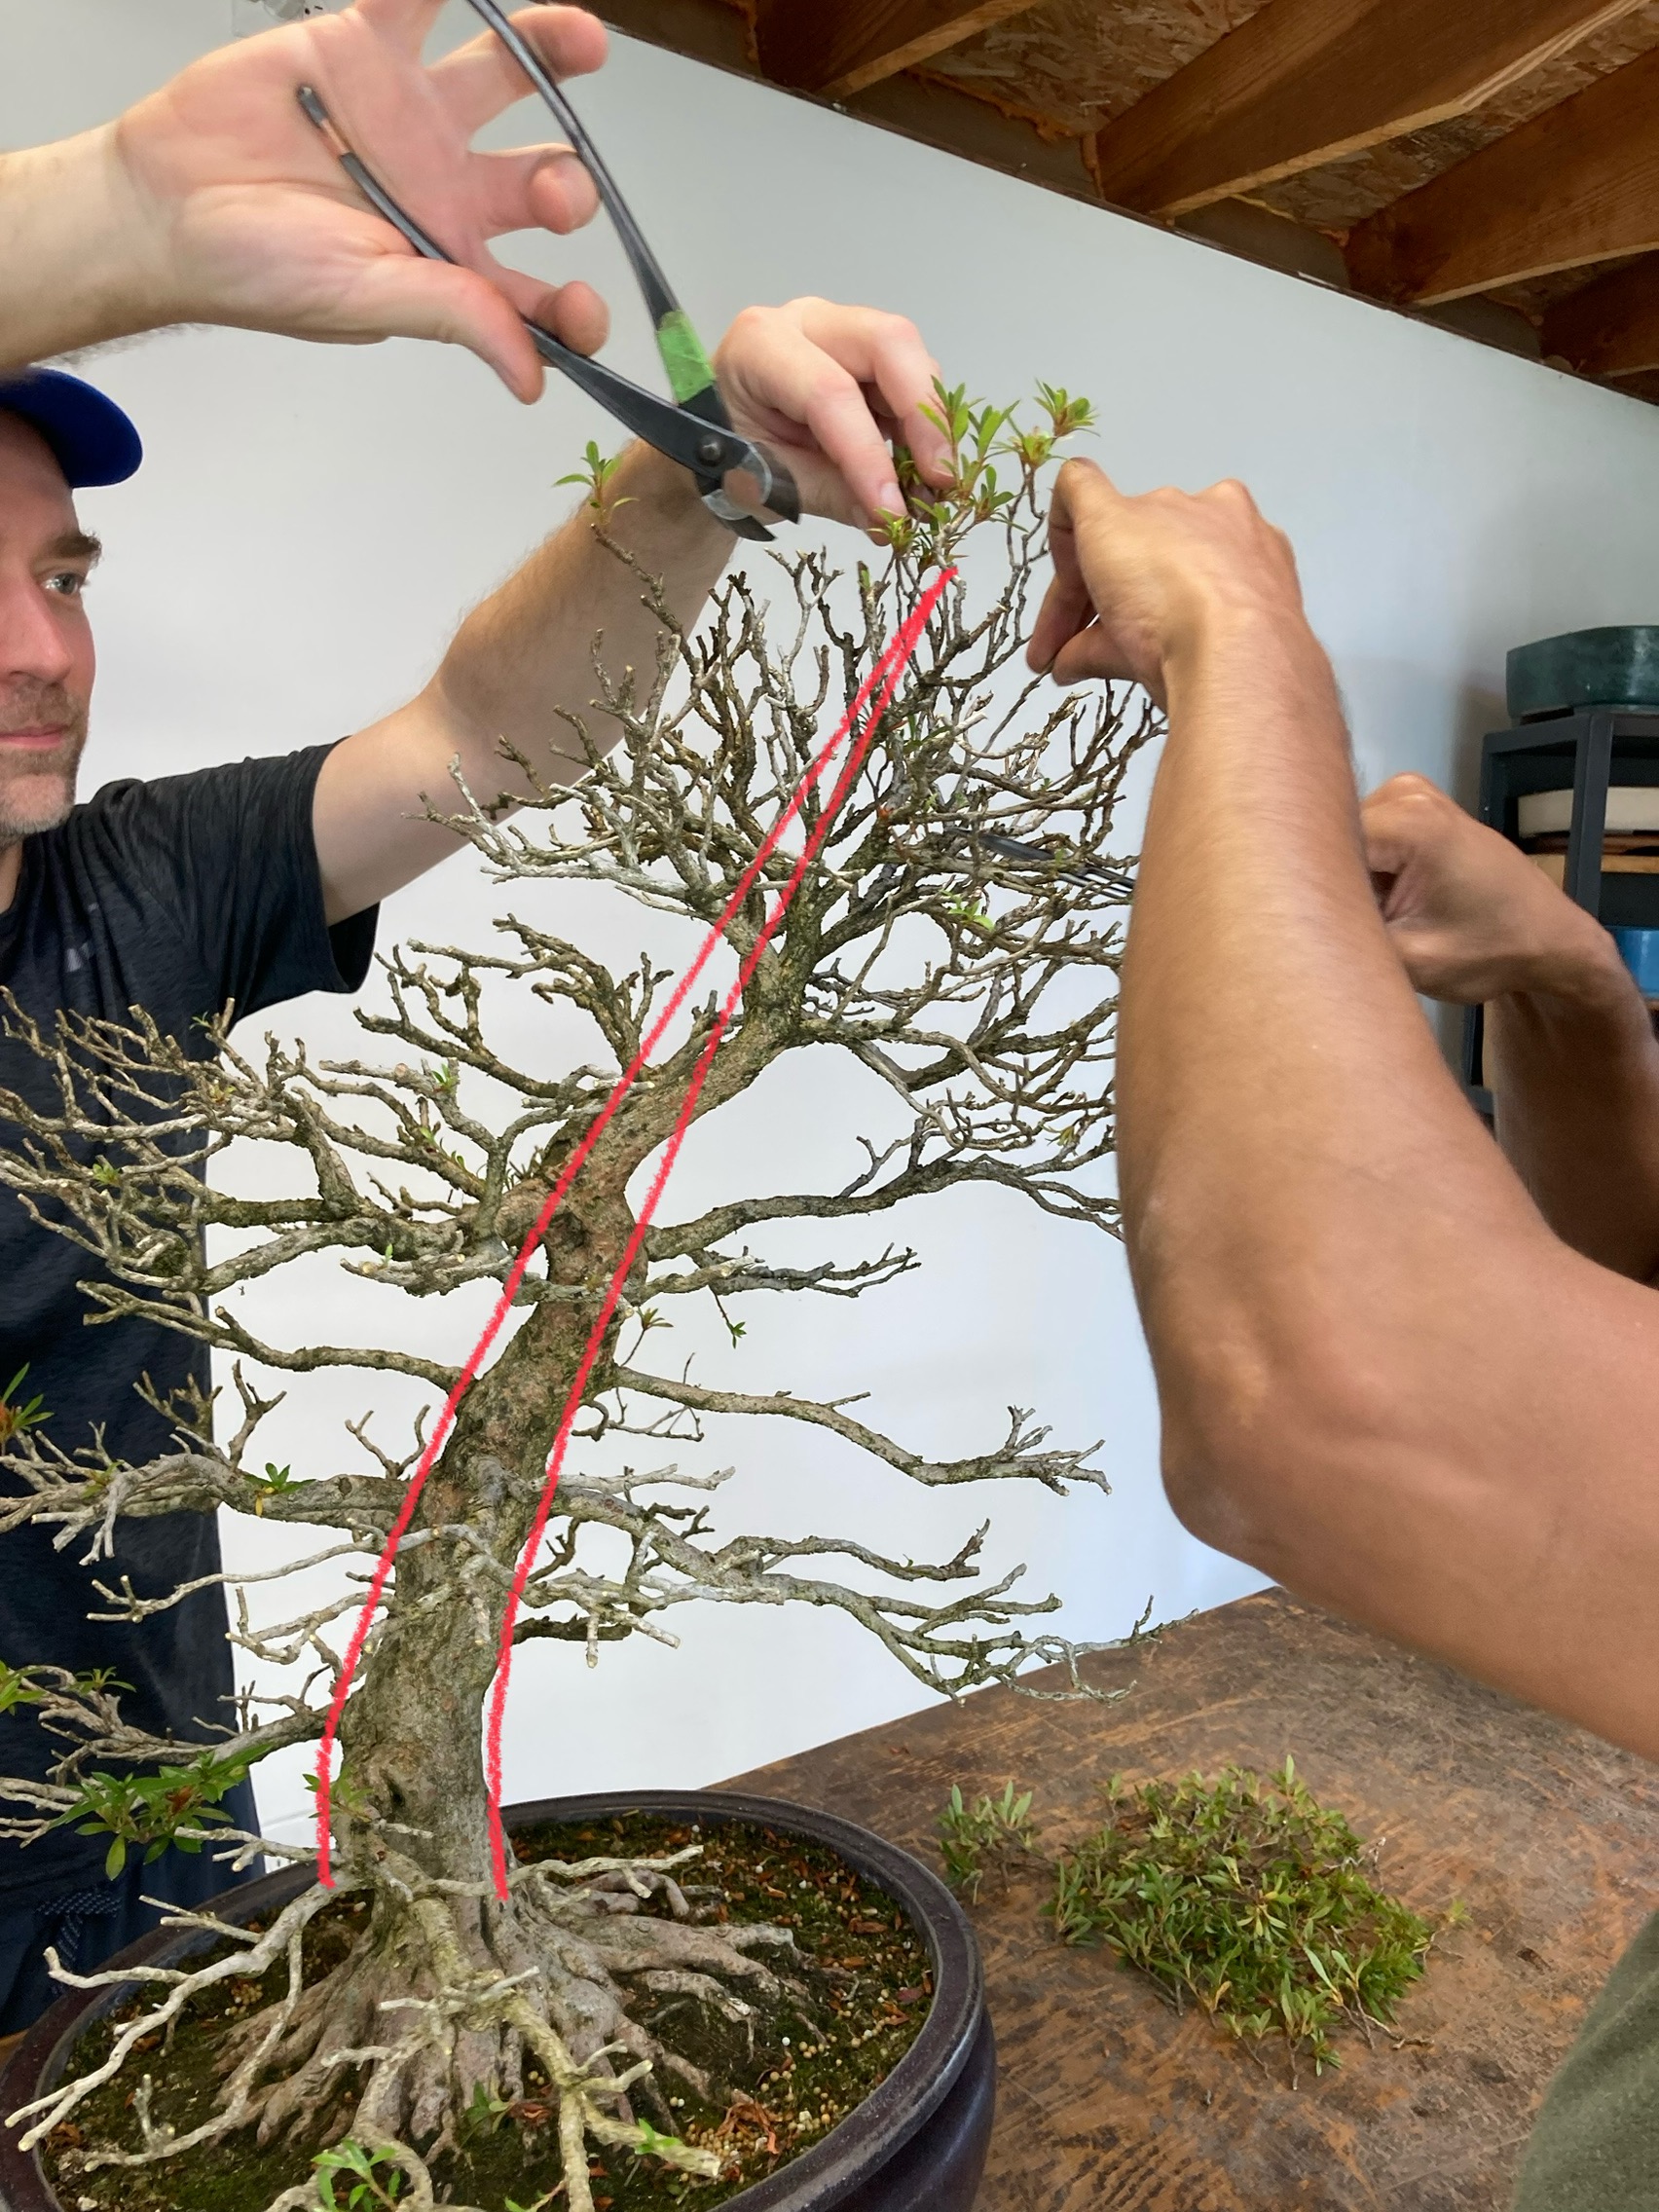
The lines of this Satsuki intersect lower than the current crown, so this tree would benefit by being a few inches shorter. Which the last few snips should do.
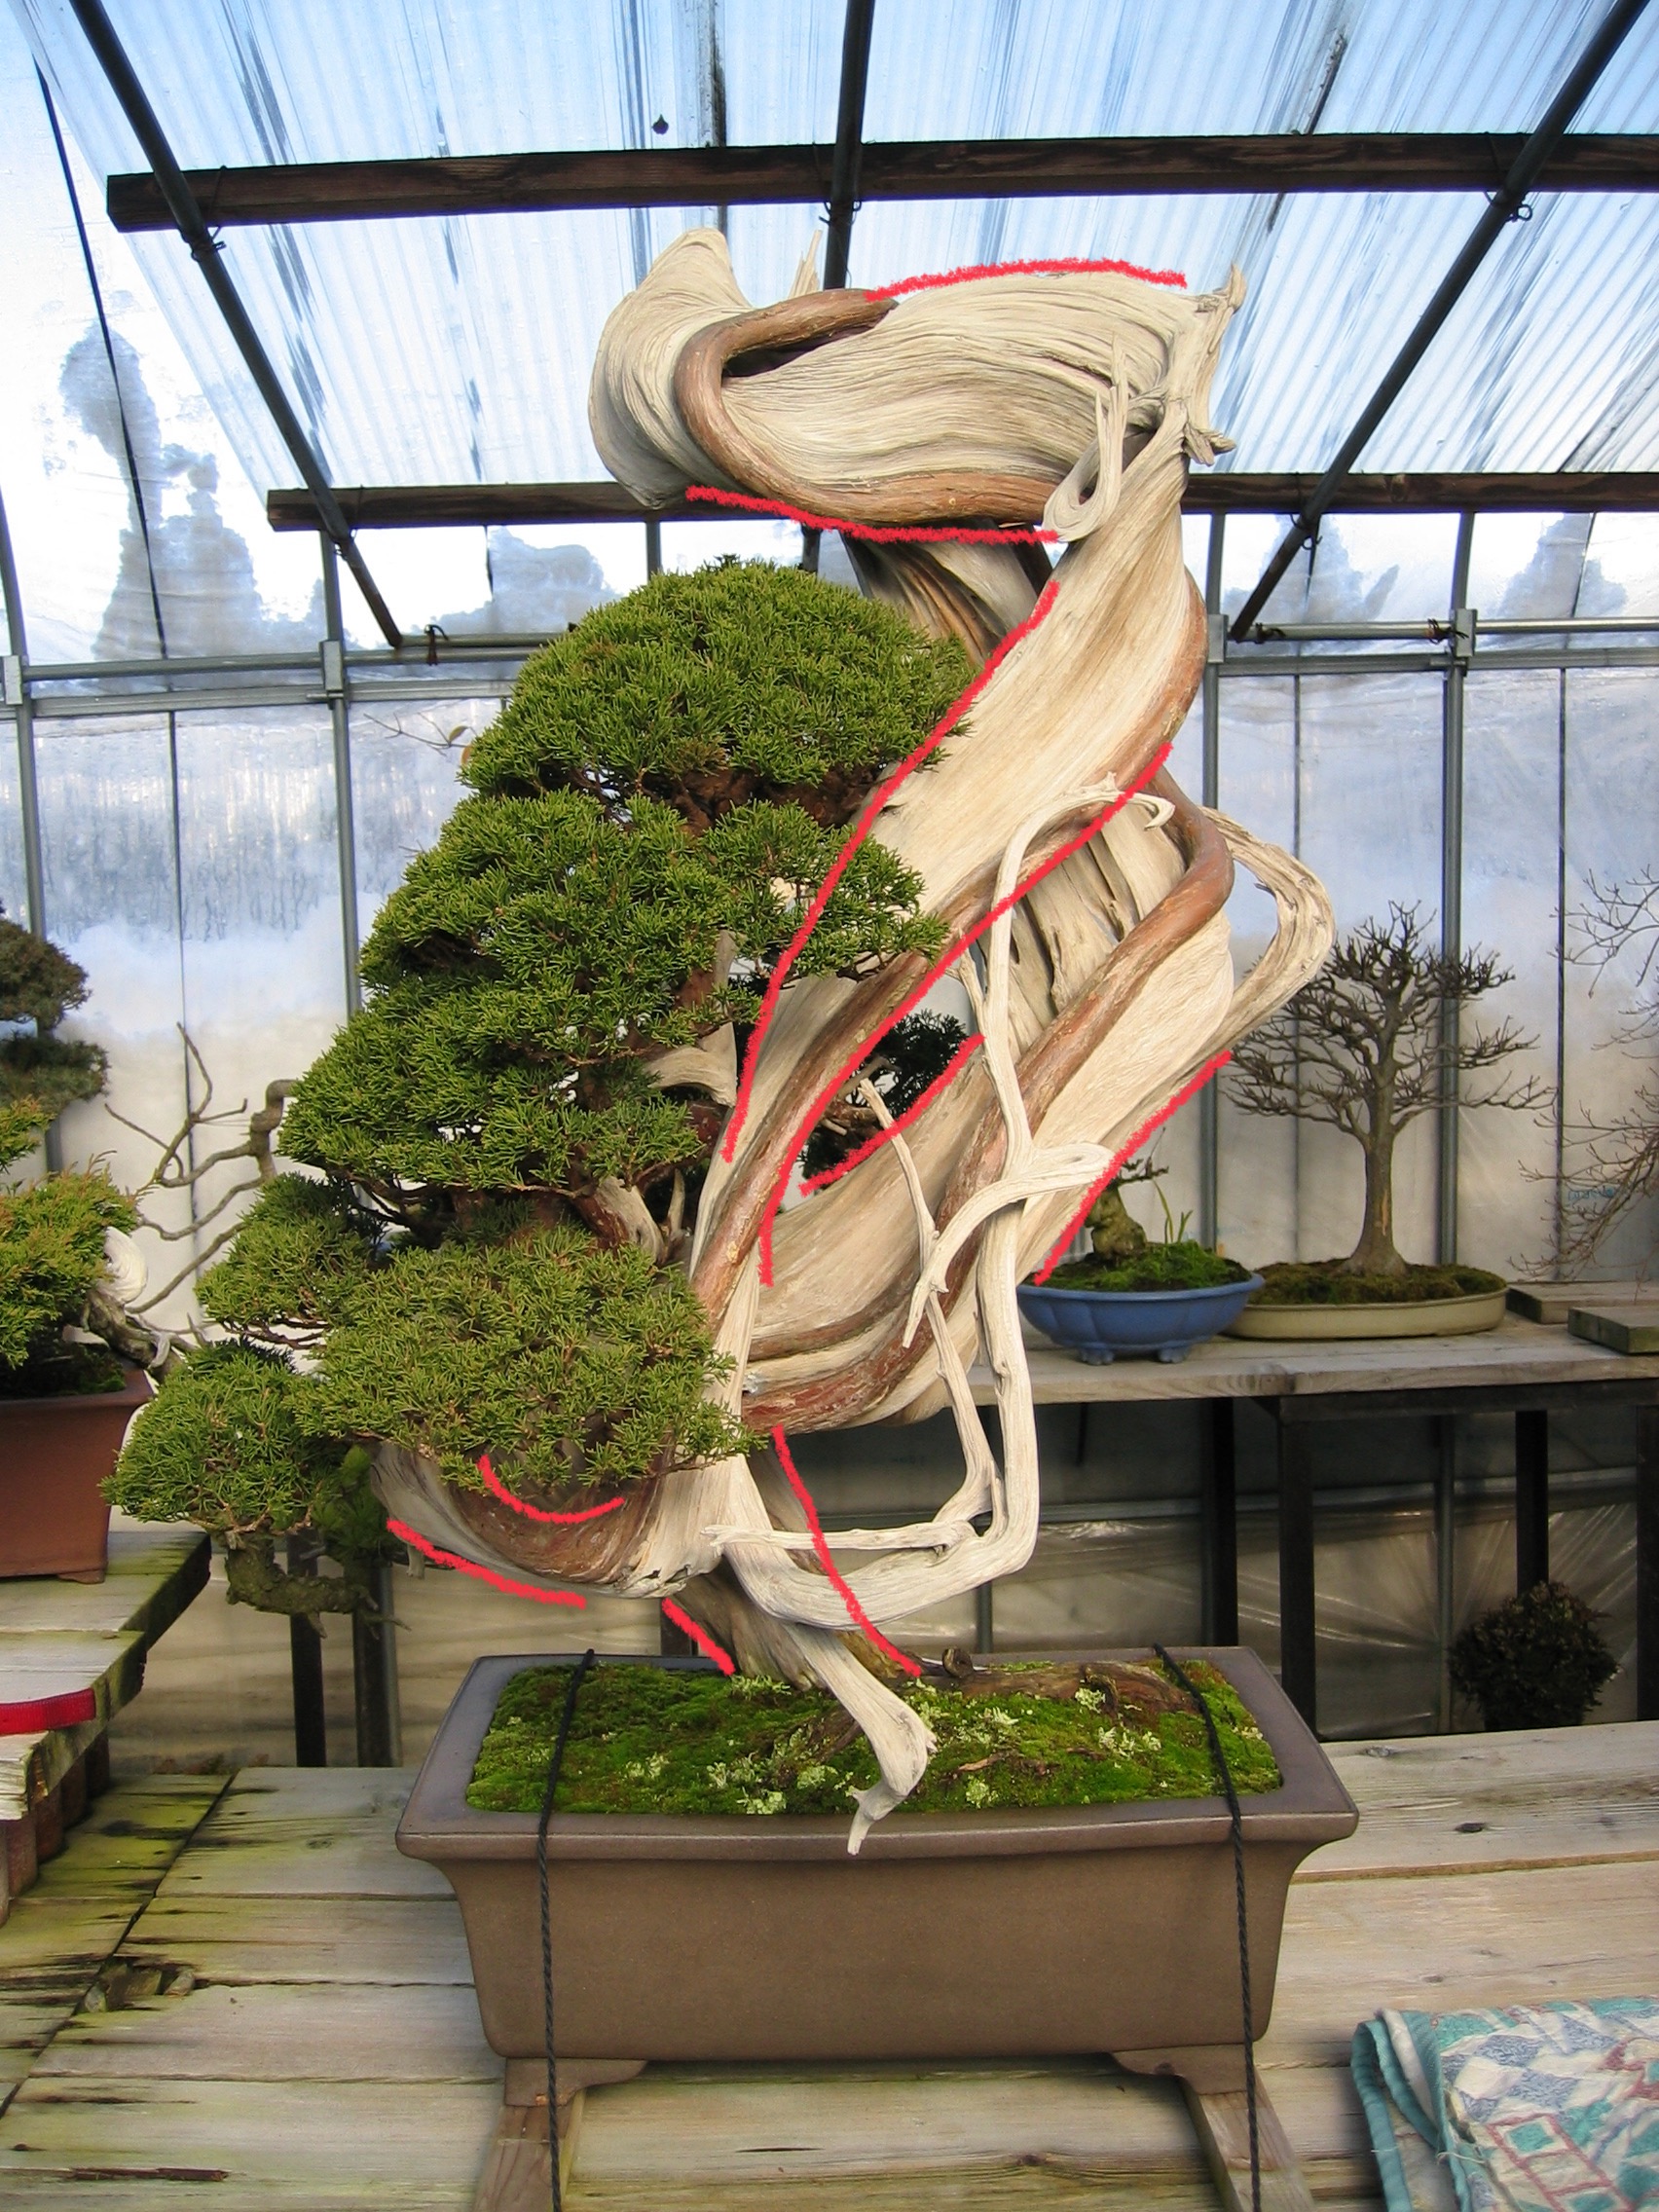
Let’s end with a couple trees where this guideline is nonsensical. The number of reverse tapers on this tree can make you dizzy, and yet it won a Prime Minister’s Award for my teacher Mr. Suzuki. The lines from the lower trunk widen—the opposite of assumed bonsai design—and then contract again near the foliage.
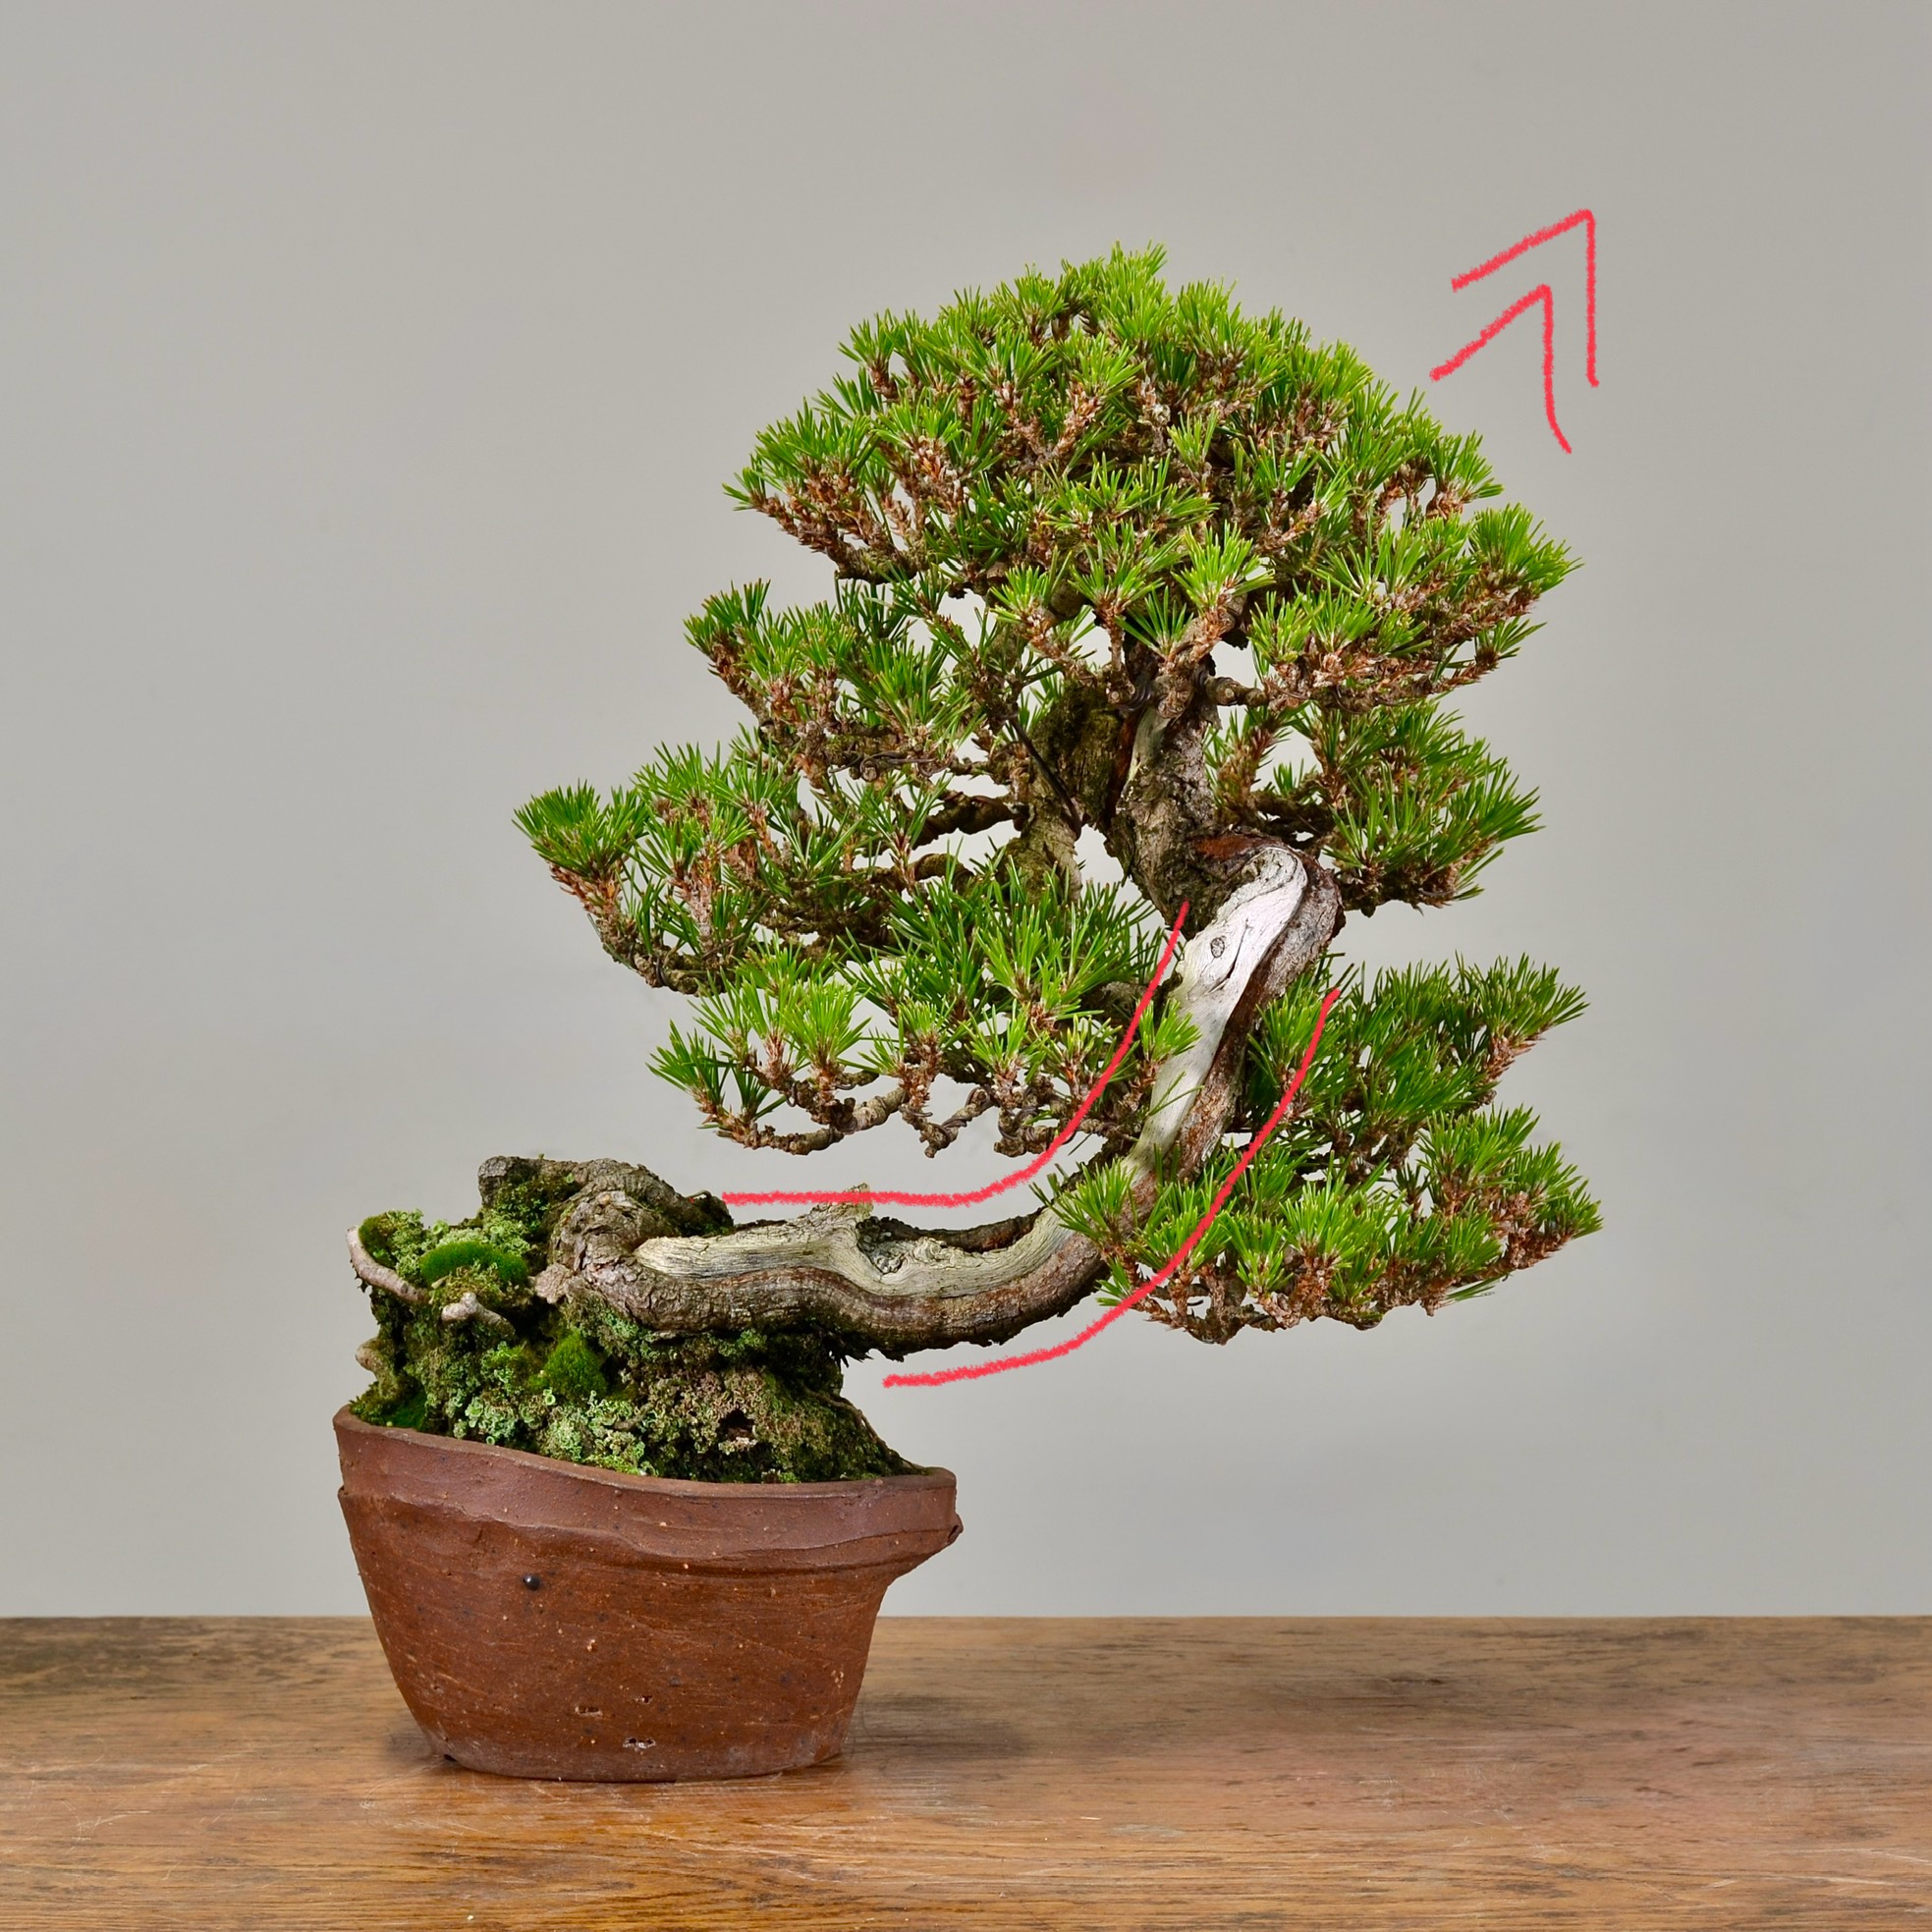
Another tree where the guideline is silly, a tree with no taper whatsoever. It was topped off at 14” which was based more on the desire for compaction and available branches to frame the shari. An example of how a guideline can in real world situations be limited to the point of being useless. Though with other trees, particularly those that fit inside the traditional framework, this guideline can have modest utility.