
I’ve been waiting three years to start shaping one of the junipers in my garden. Since I decided to graft it in winter, 2018, I’ve been allowing it to grow freely until there was enough new foliage to support the tree on its own (see “Grafting follow-up” for the previous post about this tree).
I suspected it was ready for styling so I started pruning it this week. First, here’s how the tree looked last summer.
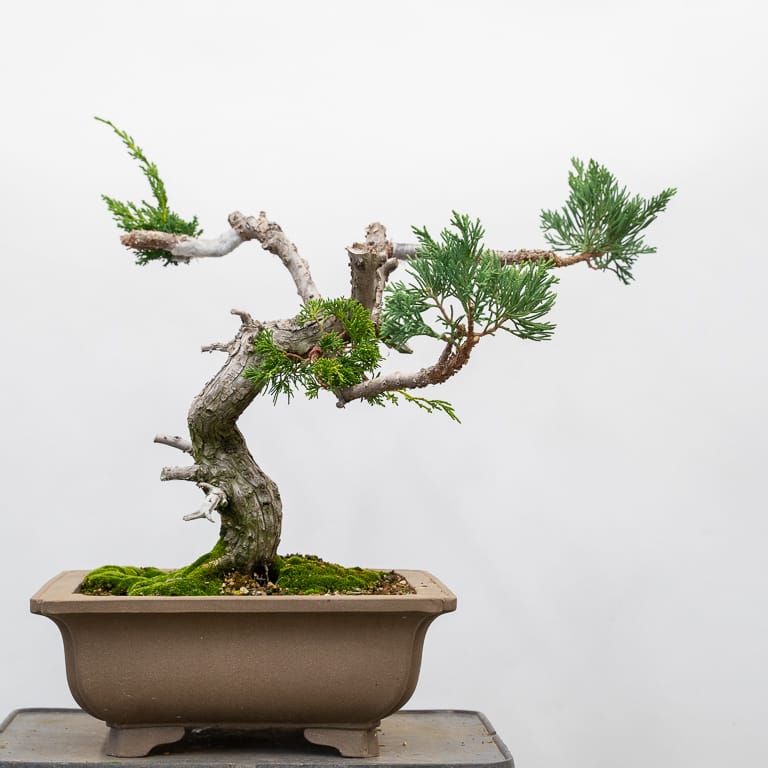
Grafted juniper – September, 2020
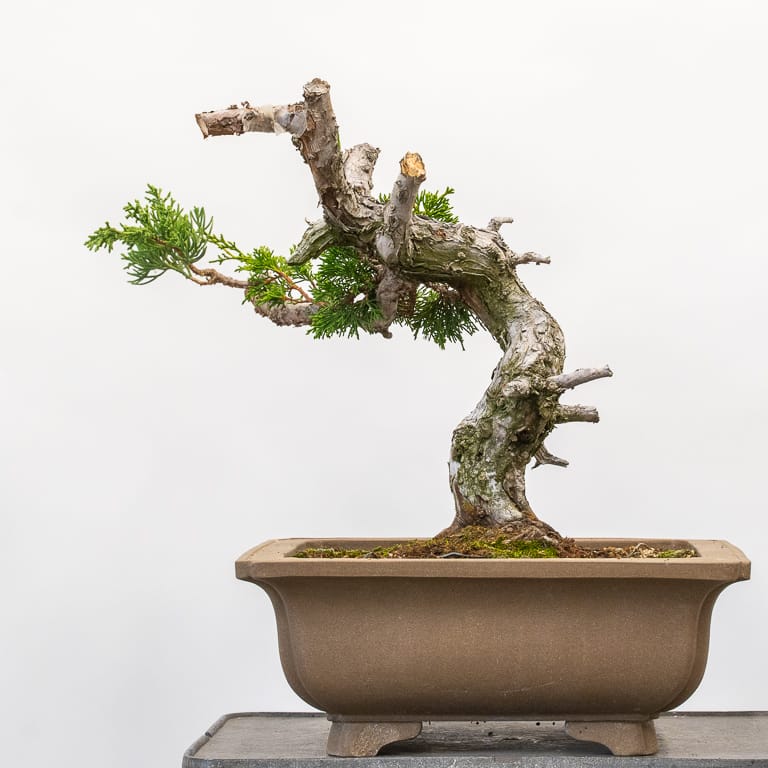
And here’s what it looked like earlier this week.
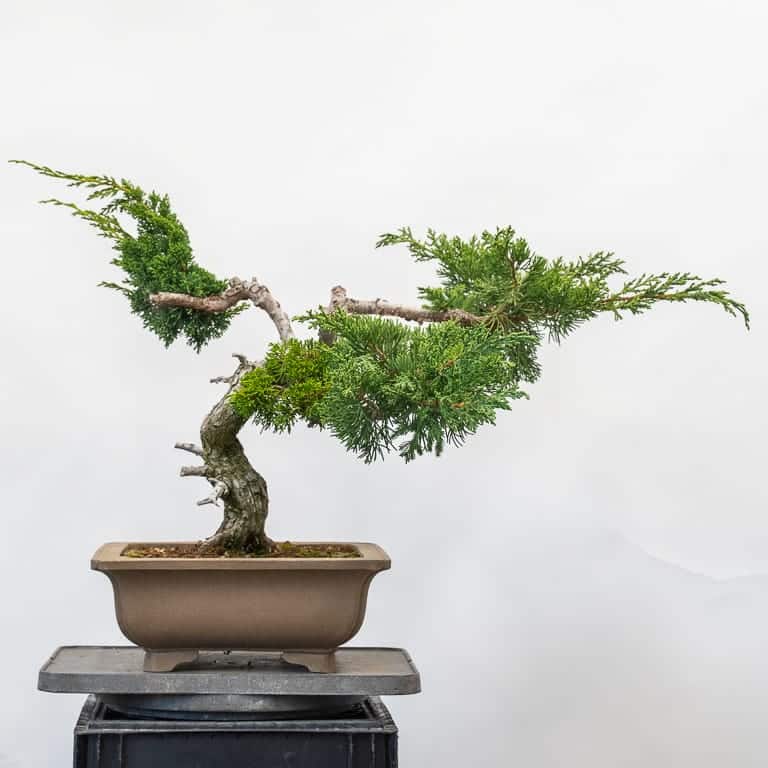
August, 2021
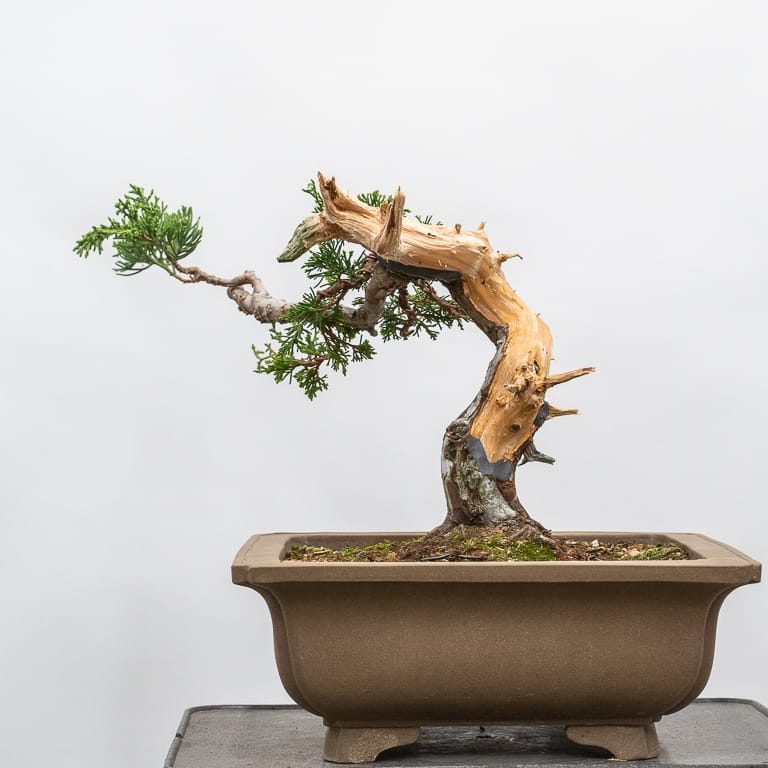
It’s hard to distinguish the grafted foliage from the original foliage in the photo above which is a sign that I neglected to incrementally reduce the prostrata foliage over the last year. But because there was plenty itoigawa foliage, I was able to reduce the original foliage on the grafted branch and remove the branches that weren’t grafted.
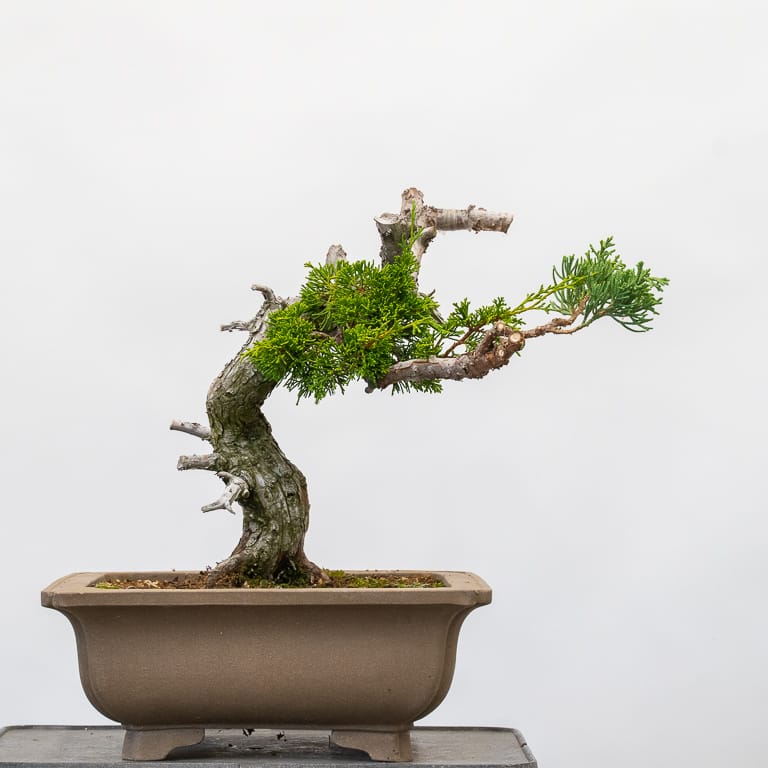
After cutback
Next, I thinned the itoigawa foliage and wired a few branches.
Grafted itoigawa juniper – 10″
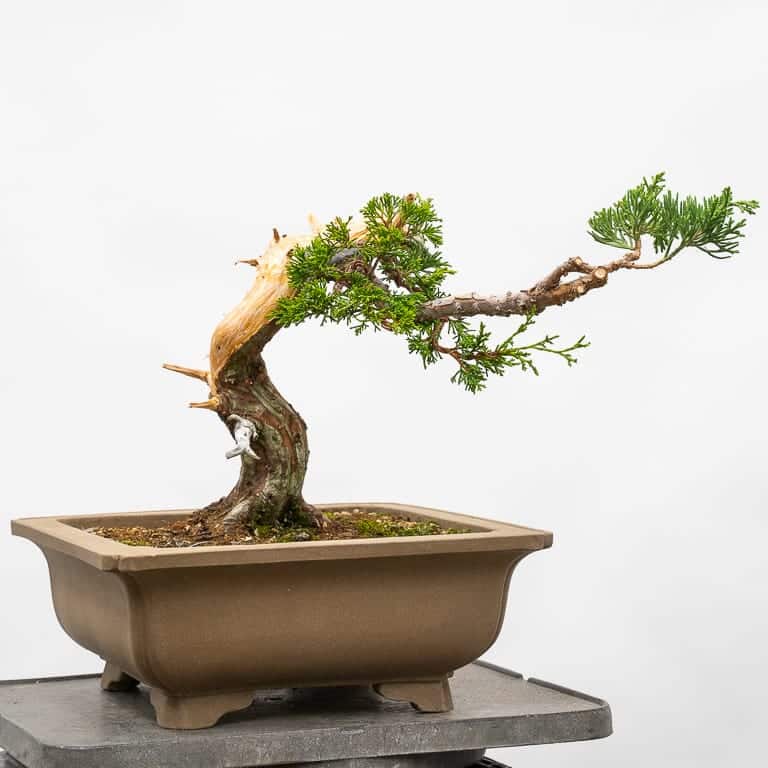
As you can see, I also did some deadwood work on the sections of the trunk that aren’t needed to support the grafted branch. Here are before and after photos from the back of the tree that show this work more clearly.
Back before narrowing the lifeline
After creating new deadwood features
I don’t typically remove so much of the lifeline at one time, but I was curious how well the tree would respond to the work so I gave it a try. If the tree responds well, I’ll find a smaller container for it and repot this winter.